Hover effect on the image is an important part of creating an attractive and professional looking webpage. With Image Hover Effects or Image Gallery, you can reach your website an apex level of beautifulness. In the past, we had to rely on Javascript for getting those special images hover effect on our webpage. And that was complicated enough as firstly we had to been through complex Javascript coding which could be the scariest thing for some people. And secondly we had to hire an expensive developer for accomplishing this task.
biggest problem for non-programming person who wanted to develop their own site for the amateur usage or something like that, such as a personal blog or something that is not much professional, but essential. In those days they had to learn coding even though they didn’t want to, or they had to solve the coding stuff by hiring a programmer. For those reasons they had to face much complexities if they want to add a special hover effect, photo gallery or add caption hover to their webpages. But now-a-days plugin like Image Hover Effect brings us the special convenience to add captions hover/image showcase items/image hover in WordPress site using shortcodes and custom post.
Image Hover Effect plugin
image Hover Effects For Elementor” is an impressive hover effects collection, powered by pure CSS3, work well with Bootstrap 3 & 4! This addon offers you 100+ hover effects and has lots of customization options with unlimited possibilities. You can use these effects with your images, there are also options for title, description, and link with the image.
FEATURES:
100+ hover effects
Unlimited Colors
950+ Google fonts support
Import hover effect demos to your site
Image size support
Responsive ready
width and height control
Background color support
Text color, font size, font-family, margin & padding support
The plugin offers 40 different hover effects including fade, zoom, blur, and more. You can add a title, description, set a title tag, add icons, link to other pages (great for products or affiliates), among other things.
It also comes with a new widget you can take advantage of if you want to see the effects in your footer or sidebar areas.
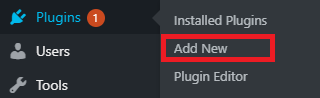
Let’s start by clicking on Plugins and selecting the Add New option on the left-hand admin panel.
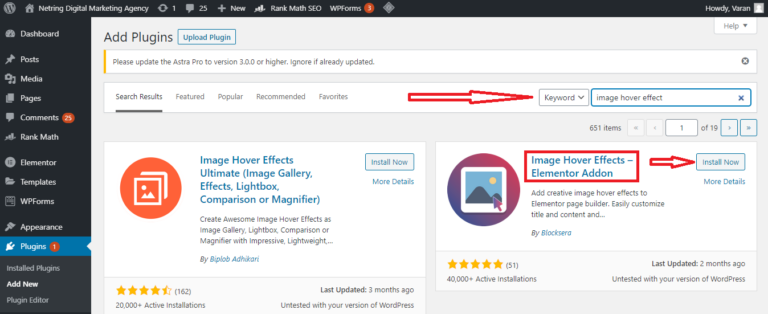
Search for Image Hover Effects in the available search box. This will pull up additional plugins that you may find helpful.
Scroll down until you find the Image Hover Effects – Elementor Addon plugin and click on the “Install Now” button and activate the plugin for use.
Step 2: Add the Image Hover Effects Widget
Luckily, adding hover effects is really easy. To be clear, you cannot simply add a hover effect to an existing image. Instead, you will need to reinsert the image with the appropriate widget within the Elementor editor.
As a result, you may have to do some media library digging to find older images, but it shouldn’t be too bad. This means if you want to add this feature throughout your website, it will take quite a bit of time.
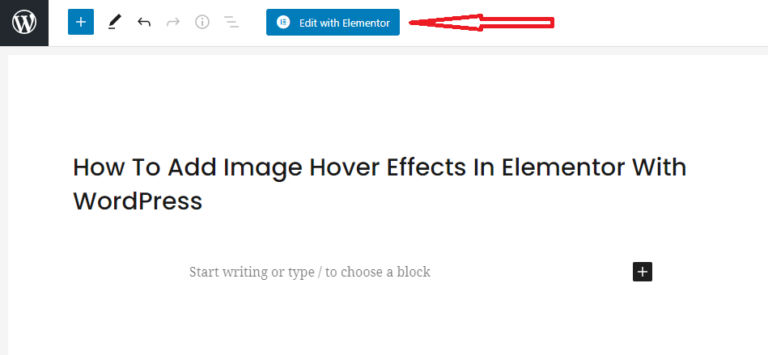
Go to any existing post or page on your website. You can also create a new one for testing. Once on it, click on the “Edit with Elementor” button.
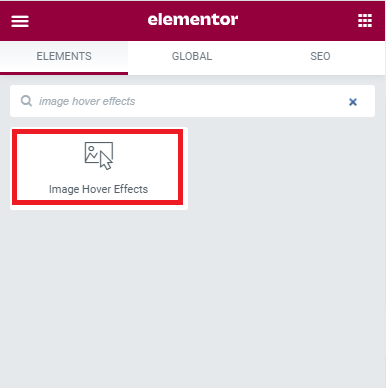
This will open the Elementor editor. On the left-hand side, search for Image Hover Effects and drag the widget into the page or post.
Your now ready to start customizing the widget and all of the settings can be found on the left-hand side.
Step 3: Set up Image Hover Effects
Going through the settings should only take a minute or two, and they’re easy enough for anyone to understand.
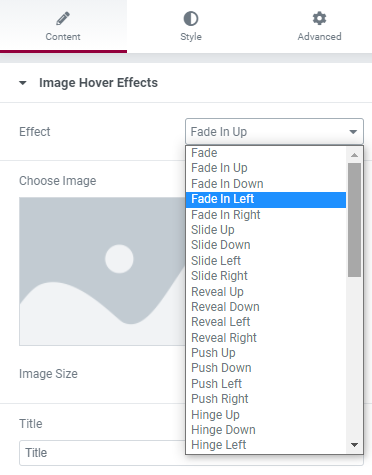
The first option is the effects. As I said before, there are 40 to choose from and they appear in a drop-down box. Select the one you want to use.
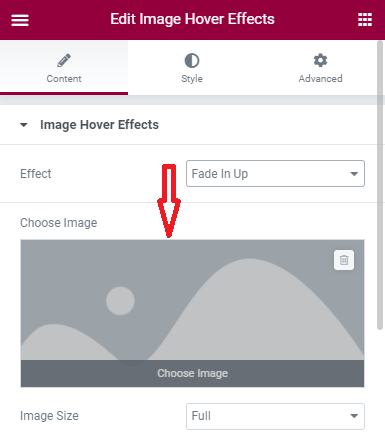
The next option is to add the actual image. Simply click on it and select an image from your media library. Underneath it, you can select the size of the image.
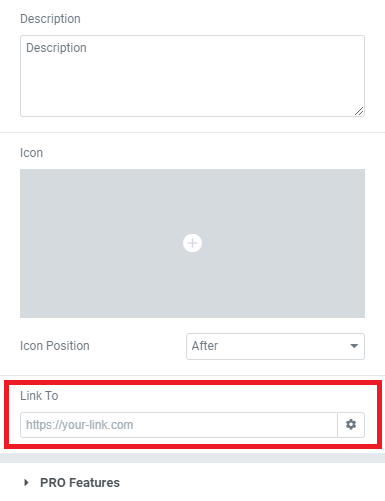
And lastly is the link to option. This is how you can turn your image into a link to another page or website. It’s great for a sales page or affiliate link.
Feel free to leave this blank if you do not want to add a link.
That covers all of the settings, click on the Save or Update button and you can view it on your website.