What are Elementor and WooCommerce?
To kick things off, in case you didn’t know (although how couldn’t you?), here’s a quick rundown of what Elementor and WooCommerce are.
Elementor is “the ultimate & free WordPress page builder.”
It lets you create an amazingly beautiful website in the quickest way possible. You can reach a high level of design, by designing live, and on the frontend of your WordPress site.
It’s currently the only (and first) frontend page builder to allow limitless design possibilities.
WooCommerce is a free WordPress plugin that incorporates eCommerce capabilities for your site so you can have an online store.
It integrates easily with your existing WordPress site, allowing you to create customizable stores in minutes, get secure payments, configurable shipping options, and much more.
Why customize the WooCommerce shop page?
A WooCommerce Shop page is simply a post type archive page for your products. In other words, it’s the page where you display all your shop products. This simple definition, however, doesn’t emphasize enough how important a well-customized shop page can be for your WooCommerce website.
First impressions matter a lot, and for a WooCommerce store, the shop page is one of the most important ones. The way you showcase your items can make a big difference in your conversion rates. You can easily tell how much attention a business pays to its website by considering how clear and well-designed their Shop page is. Everything from well-managed product grids to nifty additions like filtering options, categories list, and cart buttons are crucial to the look and feel of your WooCommerce site.
Additionally, your customers are going to spend a lot of their time on your shop page browsing your products. So, you need to take extra steps to ensure that their shopping experience is perfect. Make it as simple as possible for them to buy your products with a well-arranged and organized shop page. On top of that, you can customize your shop page to add lead generation elements and increase your profits. This includes call to action buttons, featured product sections, pop-ups for sales and offers, and much more. A customized WooCommerce shop page opens so many opportunities for you to improve customer experience and boost your sales.
We’ve previously seen different methods to customize the Shop page in WooCommerce. However, with Elementor, the process is much easier.
Once you are done with the basic configuration, then your WooCommerce site is ready to fly. Now you can add products to your online shop. The fundamental layout of a WooCommece Shop Page looks like below:
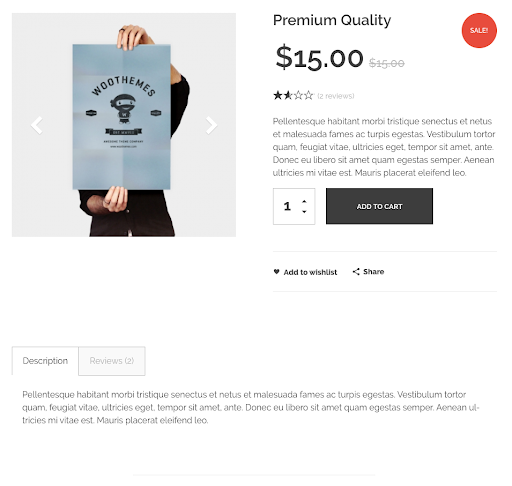
With Elementor, you can play around with the layout of the product page template however you like. In this guide, you will learn to create this product page design:
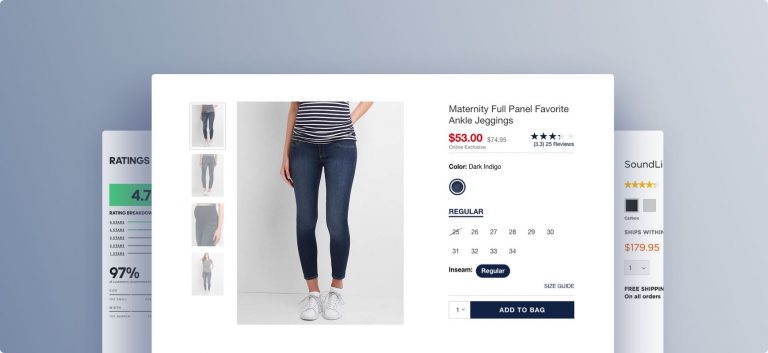
Because you’ll be using Elementor’s single product template, once you finish creating the template you’ll be able to apply it across your products, as well as for specific categories or other conditions.
1 . Create A Single Product Template
At first, navigate to – WordPress Admin Dashboard → Templates → Add New
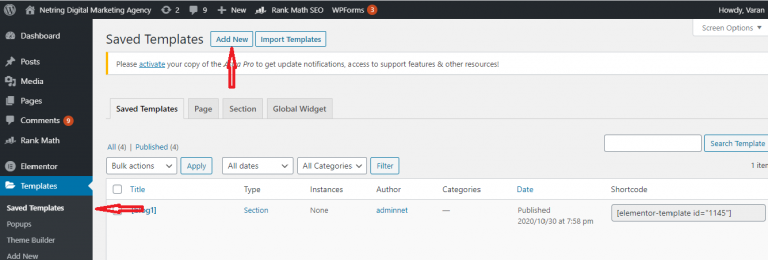
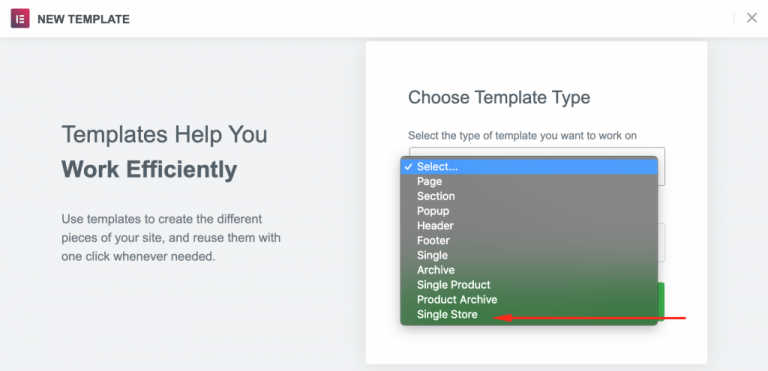
You will see the Elementor Template creation modal form. Here, select the type of template you want to create. For designing stores, you must select the Single Store type.
2. Insert an Elementor Template
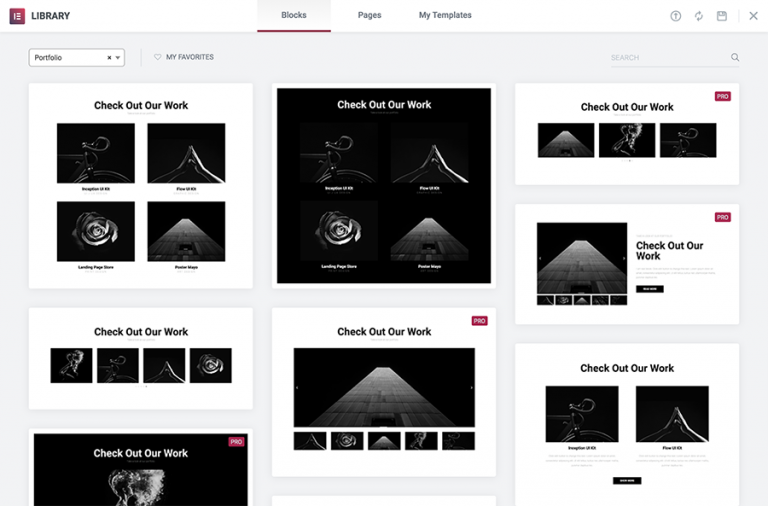
In this step, you have to choose a layout you want to customize your online shop with Elementor. Alternatively, you can start from scratch and design your page inserting different specified widgets and features.
3. Preview the Product Page With Another Product
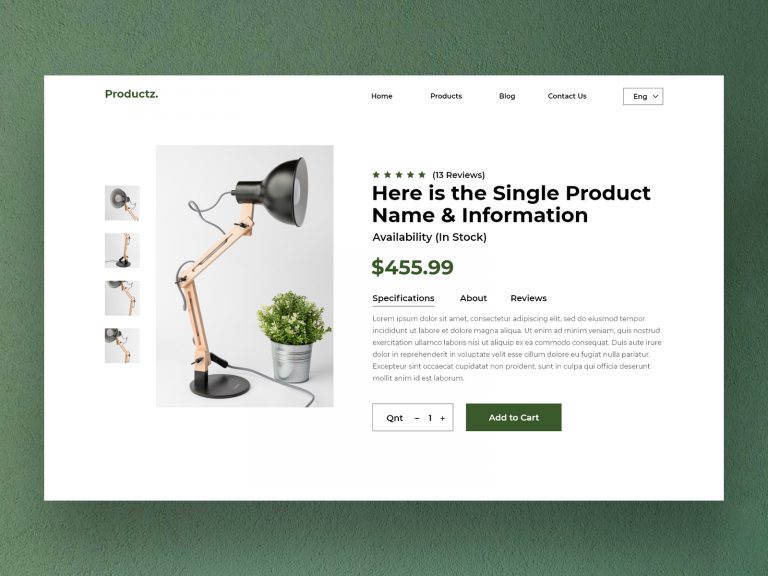
To make sure your product template has the right design, it is advised that you preview it with several different products.
Click on the eye icon on the bottom left panel, then settings. Under Preview Settings, choose the specific product you want to display. Now, apply and review to see how it looks like.
4. Customize Your Product Archive Page with WooCommerce Elementor Pro
Above we have shown you how to customize your single product page inside Elementor. Now, we are going to demonstrate the steps to design product archives with Elementor Pro.
Same as Single Product Page, go to WordPress Admin Dashboard → Templates → Add New.
This time select Product Achieve from the drop-down menu and give a name to your template.
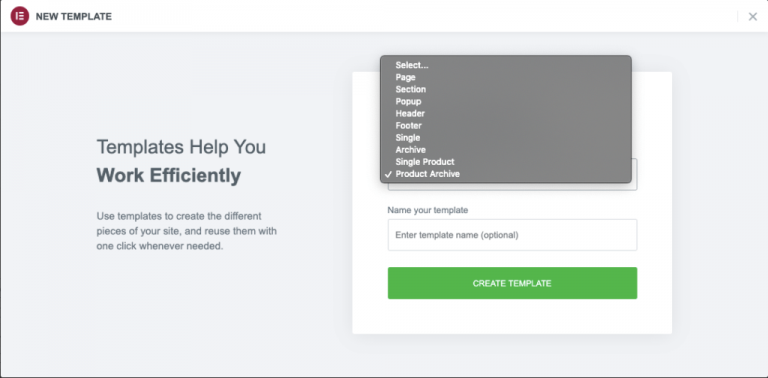
Next, hit the CREATE TEMPLATE button and wait till the editor loads up.
Again, you can select a pre-built block or start working on an empty page. Besides all regular Elementor widgets here you will get some specified WooCommerce archive widgets. Such as-
- Archive Title
- Archive Products
- Products
- Archive Description
- WooCommerce Breadcrumbs
- Custom Add to Cart
- WooCommerce Pages
- Product Categories
- Menu Cart
5. Using The Elementor To Customize Important Pages

- Change text and images
- Move design elements around using drag and drop
- Add new design elements
- For example, to edit the headline on your homepage, you just click and type
6. Set the Conditions
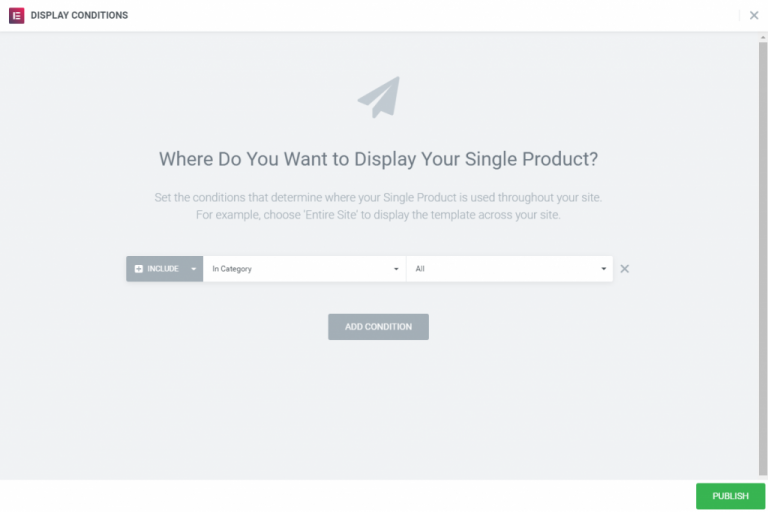
This is the stage in which you set the conditions that determine where your product template will appear. By default, the template will affect all the product pages on your site. You can also select a specific category of products.
Conclusion
All in all, customizing your WooCommerce shop page with Elementor can have a great impact on your store. The way you organize and display your products to your shoppers can help you make a sale or turn them away.
In this guide, we’ve shown you how to set up and customize your WooCommerce Shop Page in Elementor. . This is a basic demonstration to show you what you can do with Elementor to build the perfect Shop page for your store. We recommend you use this as a base and play around with it to make the most of this excellent page builder.

