Below, I’ll walk you through an example of what one can do with shortcode inside the Elementor software. While the majority of info on this page may be geared towards Elementor’s framework, this process can be replicated towards almost any WordPress build.
This core of this site was built using WordPress and Elementor Pro, using Bluehost as a hosting company.
Animations
Integrate custom animations to your landing pages
Forms
Custom forms and signup fields for marketing data
Plugins
Integrate your WordPress plugins easily and fast
Elementor Animation Shortcodes
Let’s go through the steps of what it might look like to get an animation embedded into your WordPress site, like the one you see to the right (unless your on a mobile device, in which case it will be below you).
The page loading or pre loader animation here is embedded into this site using shortcode. Let’s take a walk through the steps to show you what’s going on behind the scenes.
Step 1. Prepare Your Animation For Shortcode
First, you’ll either need to choose the animation you’d like placed on your landing page or create one yourself.
Now, before you start downloading plugins left and right you need to determine which animation format is best for you. Personally, I like JSON animation for the web because of the faster-loading speed. JSON utilizes SVG format (which stands for scaleable vector graphics) and executes the commands that you tell it to complete. This is not a tutorial on SVG creation by any means but instead geared to giving you a brief overview of the shortcode process.
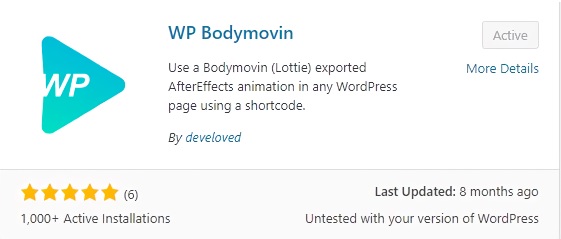
There are numerous plugins that allow you to embed your animation into a WordPress site but the most user-friendly, in my opinion, that allows for the most SVG-customization is the BodyMovin plugin for WordPress by Lottie .
Step 2. Install Your Plugins
So now that you have your SVG or other animation ready to-embed into your website, you’ll need to install the WordPress plugin “BodyMovin” by Lottie.
This plugin allows you to embed your SVG animations into a readable format for the web. An alternative if you’re looking to quickly get an animation onto your website without shortcodes is to embed a GIF into your Elementor (or other WordPress CMS) site.
Step 3. Upload Your Animation Data
Great, you’ve got your BodyMovin plugin installed and your animation-code ready!
Once installation is done, you’re WordPress dashboard will have a new tab called “animations” .
Now What?
Well, just as you might edit another WordPress plugin settings’, hover your mouse over the newly-created animations tab. You’ll see a dropdown appear that has an “add new” option – click this and title your animation.
Give your new animation a title, in the screenshot attached you’ll see I labeled mine “Loading Page Animation” – name it something you’ll remember.
Make sure to import your SVG code properly in JSON format (if you’re working with this particular SVG-animator).
Once you load in the JSON data (for SVG animation), make sure you click publish to see how your animation will render. This will NOT be the exact size of the animation, especially if you are using Elementor as you will be able to resize the container (or box) that the animation resides within.
Step 3. Generate Your Shortcode for WordPress
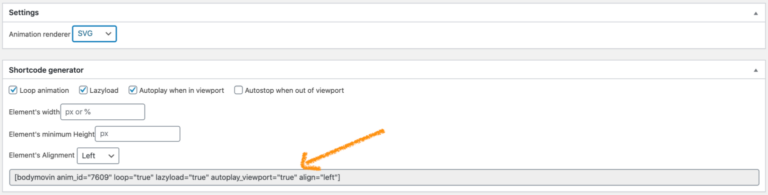
At the bottom of this newly-created animation page, you’ll see a settings tab (such as the one attached in the screenshot below).
My personal recommendation for animations is to click on “loop” – “lazyload” and “autoplay when in viewport” (seen in the screenshot below). These settings are required in order to keep a looping animation going continuously. An important consideration when creating your animation for the shortcode is to factor in the dimensions and what content it will go next to on your WordPress website.
For example an animated icon that is square could easily go next to a block of text to help supplement those who are visual-learners.
At the bottom of this screenshot, you’ll see a block of shortcode that has been generated (based on your settings from the beginning of this step). Copy this and open up your Elementor page.
Step 4. Embed Into Elementor Using Shortcode
Now that you’ve created your shortcode, it’s time to install inside of Elementor. I can’t stress enough that you DO NOT need Elementor PRO to make this animation work, shortcode is just a simply way to make one set of data “talk” with another behind the scenes and that’s just what we’re doing here.
Does this screenshot look familiar? For all you WordPress Elementor users you’ll probably recognize this as the top left menu tab for editor your individual pages.
The shortcode that you generated from the previous step, you’ll now paste into the shortcode block (in the placement of your choice).
You won’t see the animation render within the shortcode until after you save and preview your page, don’t worry this is very normal.