In this tutorial we are going to discuss how to add a back to top button to Elementor. You have probably encountered a back to top button on many websites, as it is a great little addition that increases the usability and user experience on your website. This is especially true if you have long pages like blog posts, home pages, and more, built in Elementor.
Essentially, when the user clicks the button, they jump to the top of your page. This is helpful if your header is not sticky, and is typically a lovely functionality to include on any website.
Follow these simple steps in our illustrated guide. We will walk you through the complete process from creating popup container, setting up triggers to adding scrolling effect.
Why Scroll to Top Anyway?
Having a scroll to top button available for your site visitors is great for your user experience. This is especially true for pages that can be scrolled quite a bit or for those mobile visitors who must scroll for even small pages.
You can also use these techniques to mark other sections of your page for easy jump-to links. For example, perhaps your business doesn’t need an entire About page, it just needs a section on the front page. You can give that section a CSS ID and then link to it from one of your menu choices.
Step one : Create Your Button
Drag the Button gadget onto your page, wherever you’d like to put it
Adding the Elementor back to top arrow button to the footer template will ensure that the button will be added throughout the website wherever the footer template is used.
Step two : go to the icon library
Click on the icon library to select the appropriate icon
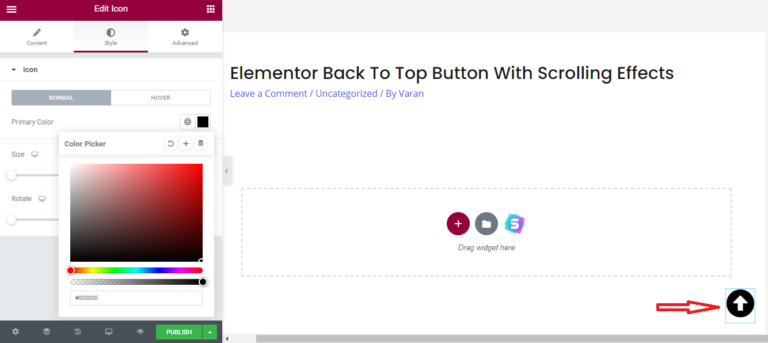
Step three : choose icon from Elementor icon library
You can also adjust the styling as you wish. You will probably want to set the size to Extra Small, and adjust the icon color and button color to your liking. Choose transparent, if you just want an icon to show up. You can choose the icon you want.
You can choose any of the icons to your liking.
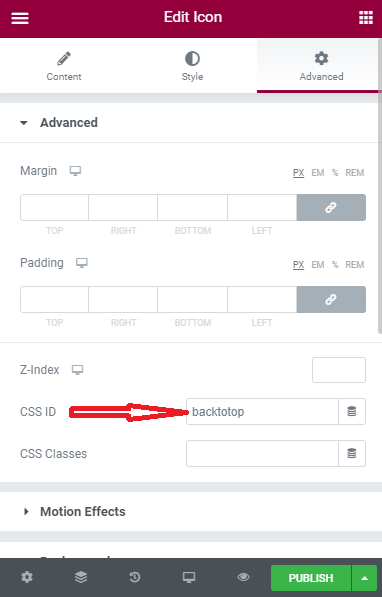
Step four : choose CSSID
You can assign an ID to your button in the specified field(CSSID).
I choose (backtotop) name for the ID. You can choose any name you want .
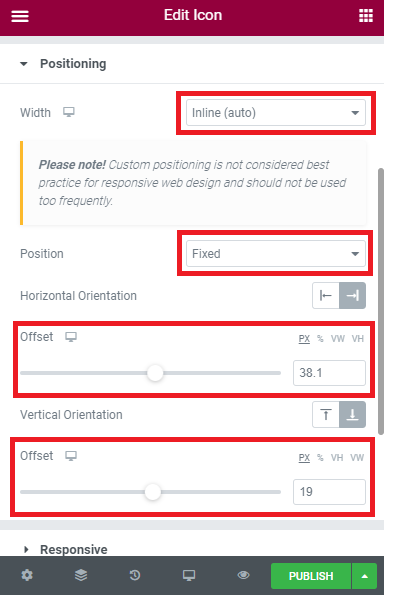
Step five : Change the icon display settings
It is better to add icon settings for better performance. To have a better user interface.
You can also add any feature you like to your icon. Such as icon size, icon color, position on the page and… .
Here you can see the position settings of the icon on the page
Step six : insert code in HTML tag
If you put the icon in a footer, add your code to the footer using the HTML tag.
But if you put your button inside the page, you have to add this code to your page.
You can now publish or update the page and when a user clicks on your top button it will automatically take them to the top section of the page.
Conclusion
A back button can simply be placed in the elementor. elementor has made the job easier for us and it is enjoyable to use. I hope it was useful for you .
If you have any questions about this instruction, don’t hesitate to leave a comment below. We will try to answer your questions as soon as possible.